The Jet Pack
Now Quakers can get airborne! Pressing the Jet Pack key (e.g. ‘J’) will activate/deactivate this rocket pack. Navigation works like swimming under water: you fly in the direction you’re looking. By the way: water? Not good! Really not good! Don’t try to find out what happens when your intakes are getting filled with water!…ok, try it, but don’t complain afterwards that we didn’t warn you! Just one more thing: if your health drops below zero while flying this thing, the fuel tank on your back will ignite! So to all those Railgun-Lovers out there: let’s perform a little trap-shooting with those Jetpacks, Great Fireworks!
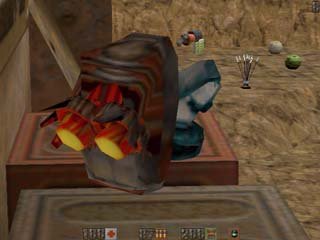
Command for item:
bind j “use jetpack”
Predefined key: “j”
The Tech Powerups
There are four different Powerups in all levels! Each one exists only once per level and you can carry only one at a time.They are:
– the Power Amplifier, which doubles your attack power.
– the Disruptor Shield, which increases your resistance to enemy attacks.
– the Time Accelerator, which greatly increases the speed of your weapons.
– the Auto Doc, which pushes your health and armor (if you have any) up to 150 and then continuously regenerates it.
A Tech can easily be dropped by pressing the ‘D’ key or typing “drop tech” in the console, but once thrown away, the same tech cannot be taken again until it respawns or somebody else has picked it up and somehow dropped it (killed maybe?..:)!
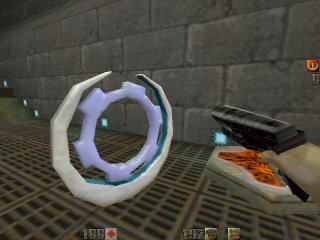
Command for item:
to drop it: bind d “drop tech”
Predefined key: “d”
The Invisibility Powerup
Another new feature: we added a new kind of power-up: In addition to the Quad Damage and the Invulnerability now comes the Invisibility! Once found and taken, you become invisible! The only thing that gives away your position is a slight flicker in the air and some static sounds every few seconds… the whole thing lasts for about thirty seconds! Very funny seeing a point on your radar but no one in front of you and suddenly a rocket evolves out of the air a few feet in front of your face! 🙂
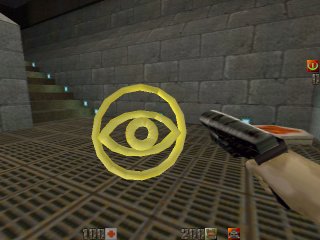
Command for item:
no command needed
The Grappling Hook
Here it is, the ultimate grappling hook. We have made it so that you have to pick up this nice tool before you can use the grapple option. Once you have it, you need three keys to navigate with this baby. First, there is your shoot key (in our example ‘end’). Point at a wall or something equal, press this key and watch your hook fly! As soon as it hits a wall the grapple will instantly pull you towards it. Good for getting out of dangerous areas quickly (e.g. floors filled with lava or just lead). A second keystroke will stop the pulling! And pressing again will release you into freedom. (Think twice about this freedom if you are hanging fourty feet above the ground!!) The other two keys (for example ‘page up’ & ‘page down’) are used to release/roll up the cable, so you can navigate up and down the rope when you are hanging there. Or just stand on an edge, shoot the hook into the ground, release the cable a little bit and then step over the edge! Great for a little bungee jumping! Or swing around and play Tarzan, or, or, or… (this thing is very flexible!)Tip: If you’re out of weapons, use the grappling hook on your enemies.
These things are pretty sharp!
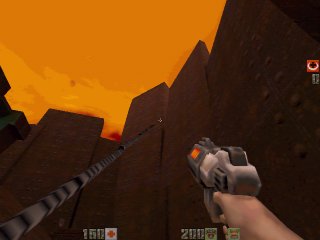
Command for item:
‘END’ – bind END “cmd grapple”
// grapple shoot/stop/release
‘PAGE UP’ – bind PGUP “cmd grapple shrink”
// for climbing up the chain
‘PAGE DOWN’ – bind PGDN “cmd grapple grow”
// for sliding down the chain
The Tele Zoom
Now for something the snipers out there will love: Zoom Binoculars that work in three steps. Just press the zoom key (e.g. ‘Z’) to get nearer to the action! After pressing the second time you should have a zoom ratio about 1:10, a third press returns you to the normal view. The other key (e.g. ‘X’, let’s call him the ‘Boss’ key) (good old Larry) is to get immediately back into the ‘real’ sight! Good if you’re getting surprise fire and don’t want to look like someone who’s got those damn binos pinned onto his head!(“Where is he? Where is he? WHERE AM I??”)
Tip: Use this together with the Railgun, or even better (’cause of the flair) with the crossbow! (Explosive arrows and the Telezoom are a nice combination!!!:)
Command for item: ‘Z’ bind z “zoom 1”
// to zoom in
‘X’ bind x “zoom 0”
// the ‘BOSS’ key
The Flashlight
Light up those dark areas where campers could hide waiting for you! This is also your primary survival tool if the ‘lights-off’ or ‘low light’ mode is activated! But beware!! The others can probably figure out your position after seeing your light cone, so use it with caution!
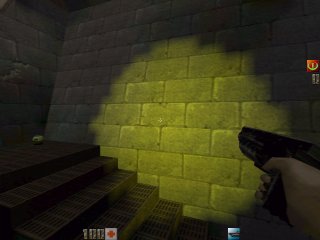
Command for item:
bind f “cmd flashlight”
The Antigrav Belt
This helpful device creates an antigrav field around your lower half that lets you jump up to about three times the normal height and prevents you from drilling yourself into the earth after you just crossed THAT edge! (Hmm? What edge? WHAT abyss?? Wha… AAAAAAAaaaaaaargh SPLISH!! That wouldn’t have happened with the Antigrav Belt) By the way: this thing also swallows one cell every 2 seconds, so don’t jump from the skyscraper before checking to see if there are enough of them remaining! Additional hint: this nice tool can get very dangerous if you are standing next to an active gravity vortex. Because of the minimal grip your feet now have, it’ll suck you in three times easier! So beware!
Command for item:
bind b “cmd belt”
The Scanner
…to get that extra ‘Aliens’ feeling. Pressing the scanner key ‘S’ reveals a radar screen in the right corner. If there’s someone near you, you can see his signature projected via this H.U.D. onto your screen in his relative position to you. (Above the middle of the radar center, means in front of you, and so on). In addition, a little white circle means that the other guy is on the same level as you. (So if there’s a round point slightly underneath your radar center he might be standing right behind you!) If your enemy is standing higher than you, the points color changes to blue, if he’s lower then it will become red! A little warning: the scanner consumes about 1 cells per 2 seconds to run, so don’t stand in a bunch of enemies, trying to figure out why your BFG is nonfunctional, it’s ’cause you forgot to turn off your scanner! To give your prey a fair chance, the scanner emits a motion tracker like sound which also reminds you that it’s still eating up your cells! (Underwater you can hear a nice sonar ping instead. Note: Due to an internal Quake problem the main menu can’t be opened while the scanner is turned on. Just in case you were wondering why these guys don’t let you out of the game. (THAT’s a feature for Quake3! NO exit button!)ANOTHER NOTE: Remember the last four items (Zoom, Flashlight,Antigrav Belt & Scanner) are ALWAYS in your inventory. You don’t have to pick them up to use them. They’re there from the start!

Command for item:
bind s “cmd scanner”

