

The different weapons are sorted roughly by their strength and abilities into so-called “classes”. Each class shares one of the weapon slots on your numbered keys with a standard UT weapon, and it will also share the same spawn points in the maps. This means you will find e.g. the crossbow sometimes where the shock rifle originally spawned, and once you’ve picked up both you can then switch between them by pressing their select key (in this case the “4”) multiple times.
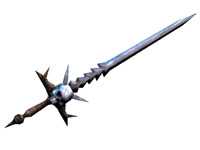
Bastard Sword:
Weapon Slot – 2
Type – Melee
Primary Fire:
Attack – The Bastard Sword is very deadly, but for obvious reasons, you must be close to your enemy to score hits. At first this seems to be a major drawback, but with the swords defensive properties, it’s a much better weapon than it appears.
While it might be tempting to just hold down the fire button when using the sword, timing your attacks can be much more effective, especially if your opponent also has one. Some practice time with the bots should help you get a feel for it. It has five different attack animations, and four defense animations, which add to the realism.
Alternate Fire:
Defense – The block feature is used by pressing the alternate fire button and is very effective against most types of attacks, such as the sniper rifle. You must be facing the attack for the defense to be of any use. A good player will defend himself as he approaches and wait to time his attack when he’s in your face. (Hint: with a bit of luck and some practice, many types of projectiles can be blocked… try it! 🙂
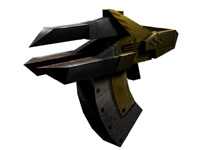
Crossbow:
Weapon Slot – 4
Type – Ranged\Melee
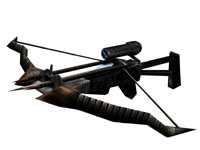 Yes, I said both ranged and melee 🙂 This deadly new version of our crossbow has a new feature. Spikes that project about 2 feet in front of the weapon and cause extra damage if your target is up close and personal. There will be three types of arrow-bolts for the crossbow… We call them arrow-bolts because our crossbow fires slightly larger bolts than normal.
Primary Fire:
Aim, shoot, and kill. Descriptions of ammo types is listed below…
Alternate Fire:
With a press of the button you now have a Sniper scope! Aim, Ziiiinnnng, BOOOOOOOOM! ( BOOM only occurs with explosive arrows, of course! 😉
To rotate between ammo types, simply continue pressing the crossbow’s select key.
Default key is the “4”
Ammo Types:
![]() Regular Arrow-Bolts:
Regular Arrow-Bolts:
We’re a bit reluctant to call these regular, as they’re actually quite effective. They’re quiet, and have no flash to give you away. When used with the scope (the alternate fire key), it’s an excellent sniping weapon. They hit hard and fire fast, so as you can see these “regular” bolts aren’t too shabby 🙂 These will also stick into surfaces for a while if they miss a player.
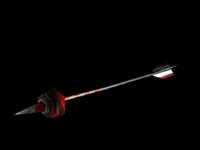 Explosive Arrow-Bolts:
Silent and quick again but now with explosive tips! Needless to say these are very deadly. These bolts fly a lot faster than rockets do, so you don’t have to lead so much. This weapon is going to be fun 🙂
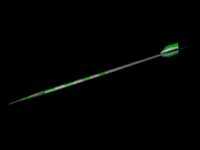 Poisonous Arrow-Bolts:
The ultimate dis-abler. Pop someone with one of these and he will be unable to pay attention to YOU for a while. Players who have been poisoned may occasionally hurl a nasty green glob at YOU, or anyone unfortunate enough to be in its way. The glob does a good deal of damage, so try to avoid it.
CAS12 Shotgun:
Weapon Slot – 7
Type – Brutal
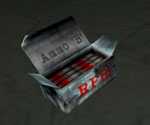
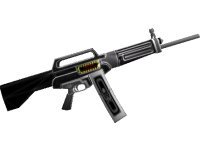 It’s gonna hurt. Get your point across quick with the CUT Automatic Shotgun, aka the CAS12. This 12 gauge beauty comes with a clip full of standard shells, and there are 2 additional ammo types available to pick up.
Primary Fire:
Fires one shell at a time, hold key down for automatic fire. When you select the CAS12, your HUD will display a row of shotgun shells, color coded to indicate which ammo type is loaded. This represents the number of rounds left in your current clip. As you fire, the shells will be removed one by one, until your clip is empty. If you have more ammo, your gun will automatically reload when the clip runs out.
Alternate Fire:
However, even though the automatic reloading is quick, if it happens at the wrong time, it can be costly, and painful. But you don’t have to wait. Simply hit the Alt Fire key when you’ve got time, then you’re fully loaded and ready for battle.
To rotate between ammo types, simply continue pressing the shotgun’s select key.
Default key is the “7”
Ammo Types:

Regular:
Standard shotgun shell, green in color. They do less damage than the other 2 types, but you’ll get more per clip.
 Armor Piercing:
Armor Piercing shells are blue in color, and are more powerful than a standard shell. These are also the most accurate of all three ammo types.
 Explosive:
Explosive shells are red in color. They are the most powerful of the bunch, but are also the least accurate, and have less shells per clip. Use them wisely.
CUT Utility Gun:
Weapon Slot – 5
Type – Ranged; Fire/Ice/Air
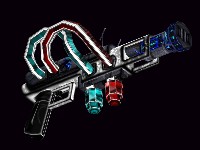 The ChaosUT Utility Gun is basically 3 guns in one. When fully loaded, you will be able to freeze your enemies, set them on fire, as well as blow them around the map with blasts of air.
Primary Fire:
The primary fire will be Ice Pellets, or FireBalls, depending on what you have loaded. And if you have neither, then your primary fire will be the Air Blast. The ammo counter mounted on top of the gun will change color to indicate which ammo type is ready to fire. Blue is Ice, Red is Fire, and Green for Air Only.
Alternate Fire:
When you have fire or ice loaded for primary fire, the Alternate fire for this weapon will still be short, powerful blasts of air. This can be used strategically, or simply to have fun bouncing people off the walls for a few minutes.
To rotate between ammo types, simply continue pressing the Utility Gun’s select key.
Default key is the “5”
Ammo Types:
Air Only : When holding an Air Only version of the Utility Gun, there will be no fuel cells loaded into the bottom of the gun, and you can only fire blasts of air. The blasts are quite powerful, however, due to the nature of the gun’s design, you need to stand back several feet from your target to be effective.
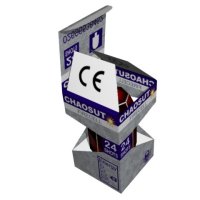 Fire: Set your enemies ablaze! These fuel cells are red in color, and there will be one of these pre-loaded each time you pick up the Utility Gun. The cell pickups have enough juice for 24 fireballs. When players are on fire, their screen will be filled with flame effects, and their health will slowly drain. After a few seconds however, the flames will go out on their own. Naturally, if there is water available to jump in, you can put the fire out yourself.
 Ice: Freeze ammo comes in 20 shot cells, and are blue in color. Use this fuel type on them, and they’ll be temporarily frozen in a layer of ice. During this time the player who’s frozen will see a bluish screen, and they will barely be able to move. Be careful though, because only direct hits will freeze a player, and they stay frozen for just a couple seconds. So use that time wisely!
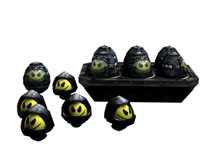
Proximity Mines (The Proxy):
Weapon Slot – 8
Type – Smart Weapon
 Primary Fire:
When hand thrown, (proxies also can be launched from The Claw) the proxy is immediately active and aggressive. You do not need to ‘aim’ proxies, they will hop around laughing and roaring while they hunt for a victim. Some weapons can harm them….but which ones you have to find out for yourself! 🙂
Alternate Fire:
When you hand toss a proxy with alternate fire, it will stick to what you throw it at (within reason!), lower its face shield, and hide out waiting for victims to approach. When a victim is close enough, it will activate and leap out at them. Pretty smart little guys huh? Perhaps the best advice when faced with a school of them is to RUN!
After a period of time, if no victim is found, all proxies eventually self destruct.
The Flak2 (AKA: The Claw):
Weapon Slot – 1 for Melee, 8 for Projectiles Type
Short Range\Melee
As a multi-purpose projectile launcher, the Claw is currently fitted to fire flak ammo and proxy mines, but research continues on additional ammo types!
 Primary Fire: flak mode
Standard flak ammo fired at medium range. Very deadly, very messy. Very satisfying.
Alternate Fire: flak mode
Standard flak ammo with much farther range, but the rate of fire is considerably slower than primary fire.
Primary Fire: Proxy mode
Proxies are fired one at a time, at medium range, but with a quick reload time, and they are immediately awake and hunting enemies.
Alternate Fire: Proxy mode
When proxies are loaded, this “playerpush” mode shoots out a proxy at a very high rate of speed, still in its eggshell. They will slow with floor and wall collisions, and once they slow to a certain speed the shells will open and the proxy will activate.
Hitting a player with a proxy in this mode will cause a big push (hence “playerpush”) and some striking damage. Once the proxy activates it will target whatever is in range (including the unfortunate soul who just got knocked back).
 Melee Mode:
Once you have picked up the Claw you can also use it as a melee weapon if you should have no ammo anymore… just switch to weapon slot 1, get near a player and press fire… should rip out a pretty nice piece of flesh 😉
Chaos SniperV2:
Weapon Slot – 0
Type – Long Range\Ricochet
 Primary Fire:
The Sniper Rifle is used without the scope. Headshots are just like the regular UT sniper rifle, but what makes our Chaos Sniper so special is the ricochet feature. If you make bank shots like a pool shark, then this is the weapon for you. If you’re good with UT’s sniper rifle already, then what we are doing is allowing you to take your sniping to go to the next level. You’re welcome 🙂 Bullets and ricochets are noisy however, and that “wheeeeeee – ting!” sound lets the target know a sniper’s on the loose! The rifle has 2 ammo types, as described below.
Alternate Fire:
The scope is used and can be zoomed in with either of two settings (set in the ChaosUT Config Menu) The first mode is the normal smooth zoom, and the second is what we call ZoomStops, with this mode the zoom jumps from 1x to 3x, 6x, 9x and back to 1x.
Ammo Types:
 Ammo Type ‘A’ : ChaosUT takes the normal UT sniper bullets, and ‘enhances’ them a bit. They travel just a bit slower than their standard UT counterparts, which forces players to lead their targets. In addition, these CUT bullets will ricochet! So watch where you shoot, they just might come back at you!
Ammo Type ‘B’ : Rocket-Propelled Bullets or RPB’s These are extremely fast, leave a nice smoke trail which points back to the shooter, and can penetrate multiple unarmored targets.
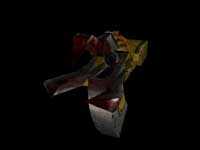
The Vortex:
Weapon Slot – 0
Type – Havoc Weapon
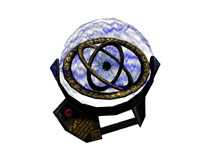
Now we’re at the “Ancient Weapons With Mystical And Unimaginable Powers” part: Here’s our new favorite sucker (you can take that literally 🙂 The three rings look kind of unspectacular at first… BUT!! Ummm… let me put it this way: throw it and RUN!!! Because after activating, this devil starts to “vacuum” and compress its organic surroundings into ONE point…this means: PLAYERS!! So, for the next 15 seconds, stay out of its way!
(It has approximately 100 feet of pull radius…but for exact measurements you should try it for yourself 🙂 )
 Primary Fire:
Use this method carefully, as the Vortex will activate almost immediately after you release it. This is however, the best way to catch your opponents off guard. They have less time to react and save themselves. Suggestions would be using this method while carrying the speed relic, so you can make a quick escape. ;p
Alternate Fire:
When using the Alternate Fire method, the Vortex will not activate until a few seconds after you release it. This gives you a better chance of getting out of range and surviving. However, there is a price for this safety, because this of course also gives your opponents a better chance of getting away.
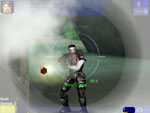
Sentry Turrets:
Weapon Slot – 0
Type – Smart Weapon
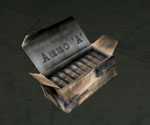
Step 1: Find turret launcher
![]()
Step 2: Fire launcher to place this beacon
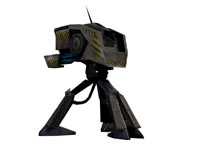
Step 3: Turret is beamed in
These are not the vicious little turrets you may remember from Q2Chaos. These are the big brothers of those turrets. In fact, these are so big they have to be beamed in when needed. The following excerpts are from the users manual which explains the basic concept:
“Chaos Inc. Military Equipment, Advanced versions, Defense Turret Gamma2.21 ‘Chickengobbler’, User Manual. Page3:
(Step 1 : Find Turret Launcher)
(A)- due to transportation problems the soldiers will only be equipped with a one-time-useable coordinate-submitter, aka ‘beam-beacon’.
(Step 2 : Fire Turret Launcher)
 (B)- The beacon has to be placed manually, and will not work anywhere but flat enclosed areas (this is because military insurance won’t pay for any more dumb soldiers who get crushed by their own turrets due to ill-conceived placement, e.g. on weak overhangs)
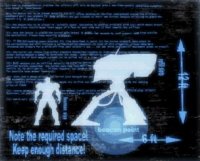
(C)- The beacon has to be placed in ‘suitable space’ (according to guiding principle Din4.11c) which means around the beacons location should be at least 6 feet of space to each side and 12 feet towards the ceiling!
(Step 3 : Turret is beamed in!)
(D)- Once the beacon is placed, the turret will be beamed in within the next FOUR seconds, by your support team from outside the battlefield. Please keep a secure distance!
(E)- If the surrounding space shouldn’t fit as described in point, the turret most likely will become stuck in its surroundings and will initiate a self destruction sequence. If this situation should occur, please retreat to a more distant location and expect the cost to be deducted from your soldier’s pay. (Do you think our special equipment grows on trees?)
(Ammo Switching / Reloading)
(F)- The turret can choose from either standard Exotec(tm) rockets or high-speed energy bullets (source: normal energy-weapon’s ammo) to terminate the enemy. (Note: switching between ammo types takes about a second, because only one of these weapon systems can be deployed at a time) You can also manually force the turret to switch the weapons. (Therefore you need to bind a key in the ChaosUT menu to the “turretchangeweapon” feature)
(G)- Either weapon can be refilled manually by stepping behind the turret.
(Security note: don’t leave empty turrets unguarded, the turret uses the last re-filler as its FFP, [FriendFixPoint] so if an enemy refills it, he will own it. If this happens, say goodbye to your pay [one turret + extra costs for possible team member funerals])
(Misc)
(H)- Hint: Don’t shoot at your own turret out of boredom, if this occurs you may trigger the automatic defense system.
Note: Turrets shoot first, and then may try to find out who shot at them by analyzing the smoking piles of flesh that remain.
(I)- Future advancement note: Turret version Gamma2.3 will contain an extra shrink stasis field and teleport functions, so you will be able to use manual steering abilities from inside the turret.
(J)- Don’t spit into the exhaust pipes!….”
Well…you should try it for yourself 🙂
Don’t forget: you have to set one key in the ChaosUT mod menu for making the manual weapon switching possible!