

Each Chaos weapon shares one of the weapon slots (on your numbered keys) with a standard UT2004 weapon, and it will also share the same spawn points in the maps. For example, you will sometimes find the Chaos Crossbow in the same spot you normally find the standard Shock Rifle, they will simply rotate. However, you also have the option of having the Chaos weapons replace the standard UT2004 weapons for the entire round, rather than cycle with them.
⇒ If you don’t want to use all of the Chaos weapons at once, you can use the provided menus to select which ones you want to show up in your game.
Once you’ve picked up both a standard weapon, and it’s Chaos counterpart, you can then switch between them by simply by pressing their corresponding numbered key multiple times (in the Crossbow/Shock Rifle example, this would be the number 4). Or you can bind specific weapons to a key of your choice, see the configs page for details.
→ Most of the Chaos weapons feature our Advanced Weapon Option (AWO). The AWO is a single keybind, yet it does many different things, depending on which weapon and ammo you are using at the time. Read the descriptions for each weapon for details.
To use the AWO feature, you must first bind a key for it in the ChaosUT2 section of your keybindings menu (Settings – Input – Configure Controls). See the configs page for a list of all Chaos keybinds.
CPP | crossbow | grenade launcher | claw2 | cutter | mug | erdw | sniper rifle | rocket launcher | gravity vortex launcher | turrets
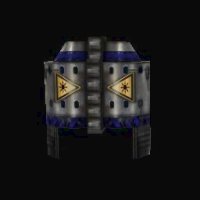
 The Chaos Pulse Pistol is a high power handgun that can be held normally or in “akimbo” mode (dual guns). It does not have much ammo however, so it is best usually to find another weapon as soon as possible.
Primary Fire: Fires a single bullet round at normal fire rate.
Secondary Fire: Fires a single round, but at a much faster rate at the cost of less accuracy.
The CPP uses one ammo type, and if you pick up a second gun you get a substantial ammo boost.
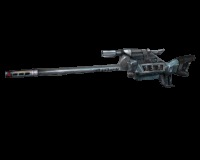
Crossbow:
Rotates with – Shock Rifle
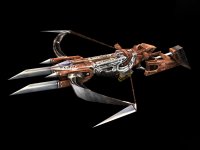 The Crossbow has been one of the most heavily used weapons in Chaos tournament history, and with recent advancements in design and ammunition, this trend is expected to continue. With 3 firing modes, and 4 types of arrows available, this bow is an extremely versatile weapon.
Primary Fire:
Using the primary fire button will fire one arrow at a time in rapid succession.
Alternate Fire:
When using alternate fire, you can load up to 5 arrows at once. You simply hold down the alt fire button, and the bow will start to load up more arrows, one at a time. You may release the alt fire key at any time, and fire 2, or 3 or 4 arrows. However, you cannot run around holding multiple arrows loaded up, ready to fire. As soon as the 5th arrow is loaded, the bow will automatically fire.
→ The Chaotic Dreams Advanced Weapon Option™:
When the AWO is activated on the crossbow, instead of alternate fire using multiple arrows, only one arrow at a time will load up, but the windlass will start cranking, increasing the tension, and thereby greatly increasing the power of that arrow. So you will only fire one arrow at a time, but it will fly farther and faster, and do more damage when it finds it’s target.
Ammo Types:
To change ammo types, use the ‘Switch Ammo’ key, which you can bind in the CUT2 configs.
![]()
Regular Arrows: The default arrow type, and sharp enough to rip players heads off.
![]()
Poisonous Arrows: A hollow point on these is filled with venom. Upon impact some of this venom will fly out as gas, but it is harmless. The venom remaining in the arrowhead, however, is deadly and the effects of it will last at least several seconds.
![]()
Flaming Arrows: The arrowheads on these are flammable, and ignited during the firing process by a sparker at the end of the bow. The arrow does some damage on impact, and since the victim catches on fire, they continue to deliver some damage afterwards as well. Also, when an arrow hits the ground its flame will stay alive for a short while, which can also catch people on fire.
![]()
Explosive Arrows: The final arrow type, these attach a small explosive to the end of the arrow, which detonates on impact.
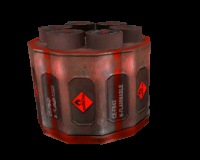
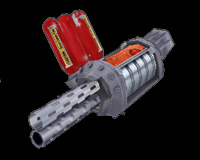
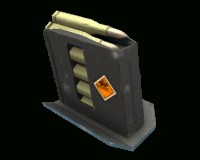
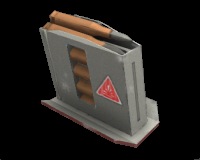
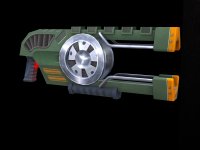
Chaos Grenade Launcher (aka The CGL):
Rotates With – Flak Cannon
 The Chaos Grenade Launcher (CGL) is most effective in close-to-medium range combat, quickly and accurately delivering standard fragmentary grenades, as well as napalm, and poison gas varieties. There are also Disruptor grenades available, which are a ‘flash/EMP’ combination, and can be used quite effectively in team and/or vehicle based competition.
Primary Fire:
Using the primary fire key will launch grenades which explode on impact. Alternate Fire:
Alt fire will give you timed grenades, that do not explode on impact.
→ The Chaotic Dreams Advanced Weapon Option™:
Each of the CGL’s 4 ammo types uses the same AWO function. Whether you have used primary or alternate fire, you can make all grenades explode on command by pressing the AWO key.
Ammo Types:
To change ammo types, use the ‘Switch Ammo’ key, which you can bind in the CUT2 configs.
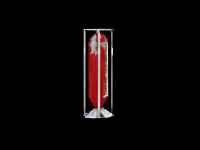
Explosive: The standard issue grenade, it will explode similarly to a rocket explosion.
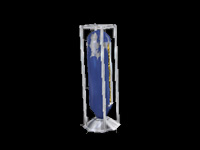
Poison: Containing a highly volatile combination of acids, this grenade type will burst into a cloud of poison when it detonates. The poison will cause vision impairments as well as bypass all armor and eat away directly at your health.
Napalm: Similar to the poison grenade, except the vial is filled with a self-igniting gas. Upon detonation, flames will be spread over the nearby area, causing burn damage as well as setting players caught in the blaze on fire.
Disruptor: The Disruptor grenades are a “flash/EMP” combo, and are useful whether your opponent is on foot or in a vehicle.
When detonated, a small but very bright explosion will erupt from these grenades. It is bright and powerful enough to white-out any eyes and/or visual sensors that are directed towards it… but be advised that these effects wear off fairly quickly.
The disruptor grenades also emit a powerful ‘EMP’ burst, which will disable vehicles and turrets, and they will even produce a ‘ringing’, or ‘buzzing’, in your ears.
The bottom line is that no matter what your enemy is up to, get a few of these in his face, and he will definitely be affected, delayed, and probably very annoyed… but only briefly. It’s up to you to take advantage of that time.
» GamePlay Tip: Use the AWO feature with a series of Disruptor grenades fired high in the air, to attack a flying vehicle or grapple-swinging opponent.
Chaotic Dreams FC12 Multi-Item Launcher (aka: The Claw2) :
Rotates With – Bio Rifle
 The Claw2 is a rather unique, and extremely useful weapon. It currently utilizes three completely different ammo types, and basic use is quite simple, just pick it up and fire (proxy mines are the default ammo type).However, to make the most of this weapon, one must learn to use the various ammo types and firing methods, in the proper situations.
Perhaps more so than any other weapon, the more the player discovers and utilizes some of the many tactics that are possible with this gun, the deadlier it becomes.
→ The Chaotic Dreams Advanced Weapon Option™:
Making maximum use of the Chaos AWO feature, each of the Claw2’s three ammo types has a unique AWO function. See the description of each ammo type below for details.
Ammo Types:
To change ammo types, use the ‘Switch Ammo’ key,
which you can bind in the CUT2 configs.
 Proxy Mines: They’re alive! That’s right, the cute and lovable little killing machines are back! And as always, these guys have attitude! They are happy to hunt and frag for their master. They will seek out enemies who are on foot or in vehicles, and even attack enemy turrets and proxies! But they are infamously unstable, so be careful not to get in their way or make them mad while they are at work… they just might turn on you!
Primary fire – Claw2/Proxy Mines:
Releases an active proxy, which upon hitting the ground will immediately start to hunt for victims. The proxy will either find an enemy and explode when it attacks, or self-destruct when it’s timer runs out.
Secondary fire – Claw2/Proxy Mines:
This puts the proxy in sleep mode, and lowers its visor. It will attach to the first surface it touches, and will stay in place until it’s timer runs out, or until a hapless victim wanders too close, at which time it will revert to active status and attack.
→ Advanced Weapon Option – Claw2/Proxy Mines: (See this feature on video!)
Once you have an active proxy mine – and one selected in the Claw2 at the same time – you can then use the AWO key to take remote control of the active proxy mine, a sort of ‘SpyProxy’. You will actually see thru the proxy’s eyes, and have control over where he goes!
When in control of the proxy, you can look all around, and use your jump key to make him jump forward. You can even use your Fire key to cause the proxy to explode on command. Your view returns to normal when the proxy dies.
Note: For game play purposes, the SpyProxy feature is not available in the Chaos Duel game type!
» GamePlay Tip: Use a SpyProxy when playing defense in CTF to scout around outside, while you are still safe inside your base. When you spot an incoming attacker, you can explode the proxy in his face. So then you’ll know which way the guy is coming from, and you’ll have already hurt him, before he even gets to the door.
 Fire Mines: When these mines are placed against a wall or other similar surfaces, they will emit a special laser beam. When that beam is cut, it will ignite in a string of fire. Use them wisely however, as they are easily destroyed, simply by shooting the ‘base’ of the mine.
Primary Fire – Claw2/Fire Mines:
The mine will attach to whatever surface it hits, and emit a single laser beam, directly out the ‘front’ of the mine.
Alternate Fire – Claw2/Fire Mines:
The mine will attach to whatever surface it hits, and emit 2 beams, each one coming out either side of the mine.
→ Advanced Weapon Option – Claw2/Fire Mines:
Once the mine is attached to a surface and activated, you can use the AWO key to trip the mine at any time of your choosing.
» GamePlay Tip: Firemines placed out in open areas are often the easiest to spot and either destroy, or simply avoid. It can be much more effective to place them around a corner somewhere, like a turn in a hallway. This way fast moving players who aren’t expecting it might turn the corner too quickly and run right into them, before they have time to react.
 Needler: The Needlers are nice little balls of explosive, packed with extremely sharp ‘needles’, which can cause a massive amount of blood loss to players. These are very useful in close quarters combat.
Primary Fire – Claw2/Needler: Primary fire will shoot a bunch of needles directly out of the weapon, which then stick into players on contact. The needles will also stick into walls and floors for a short period of time, and continue to cause damage to anyone who comes into contact with them.
Alternate Fire – Claw2/Needler: When using alternate fire, the needles are delivered in an explosive ‘ball’. This Needleball will stick into players or vehicles, and blow up after a few seconds.
→ Advanced Weapon Option – Claw2/Needler: (See this feature on video!)
Once you have at least 8 needler ammo in your inventory – and one selected in the Claw2 at the same time – you can then use the AWO key to initiate the Chaos Kamikaze! For safety reasons, you must hit the AWO key not once but twice to activate the Kamikaze. The first hit of the AWO key will initiate the Kamikaze, but if you don’t press it again in the next few seconds, that Kamikaze is deactivated.
Once the Kami is activated, your player model will automatically place the needle balls all over himself, and your view will switch to 3rd person. You then will see and hear the needle balls on yourself, smoking and beeping their countdown. You also will hear your own voice in a bloodcurdling scream, as you run, jump, and grapple like mad to get near your opponent… who by this time is usually turning and running away from you just as quickly as they can.
The ChaosUT Tactically Enhanced Ripper (aka C.U.T.T.E.R.) :
Rotates With – Minigun
 Inspired by the Buzzsaw for Q2Chaos, and the Ripper from Unreal Tournament, the CUTTER delivers exactly what players have come to expect. Extremely sharp circular blades flying around the arena, capable of quick clean headshots even after multiple ricochets.
 Primary Fire: Fires blades that are designed to remain deadly even after ricocheting repeatedly.
Secondary Fire: The weapon flips on it’s side and fires vertical blades which explode on impact sending shrapnel in all directions.
The CUTTER uses one ammo type, and there are 12 blades per pack.
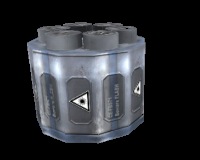
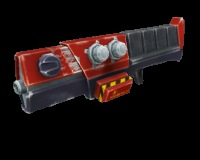
Chaos Multi Utility Gun (aka MUG):
Rotates With – Link Gun
The Multi Utility Gun, or MUG, is a combination flamethrower/ freezethrower that uses short pulses of air to propel its ammunition at the enemy.
Primary Fire:
There are two types of ammo available, and depending on which one you have loaded, primary fire will send out a stream of either burning fire or freezing cold.
Alternate Fire:
Alt fire will cause a short, single air burst, useful for self propulsion or for knocking things around. Using it to assist a jump can allow you to reach new heights.
Ammo Types:
To change ammo types, use the ‘Switch Ammo’ key, which you can bind in the CUT2 configs.
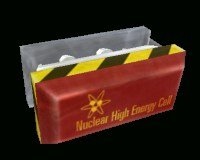
Ammo Type ‘A’: The main ammo type of the mug is the flamethrower, which causes high damage if you can keep the opponent in your sights. Be careful of firing into walls point blank, however, as you can also occasionally set yourself on fire
Ammo Type ‘B’: The second ammo type of the mug produces a freezing mist, causing damage and slows down motion. If an opponent is chilled enough they can also freeze solid, and lose control of themselves temporarily.
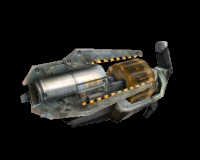
Enhanced Rail Delivery Weapon (aka ERDW):
Rotates With – Lightning Gun
The ERDW is capable of delivering a slug at ultra high speed, instantly causing considerable damage to the target. The rail slugs are extremely deadly, however they cause no ‘splash damage’, and in addition, the weapon was not designed with a scope. Thus requiring the user to be a sufficiently trained, and skilled marksman to take full advantage of it’s inclusion in the tournament.
Primary Fire:
Primary fire will deliver one slug to your opponent, in a hurry. The amount of heat energy involved in this will also cause your opponent to instantly ‘steam-up’, and combust. The end result of which is having all flesh removed from the bones, leaving nothing but a skeleton behind.
Alternate Fire:
Building on previous rail gun technology, the secondary fire mode has been enhanced, and is now capable of firing directly through solid objects, such as walls. Without a scope however, it can be extremely difficult to target the enemy using this method, and two slugs are required for each attempt. When using secondary fire with only one slug left, the weapon still fire, but it will not penetrate any walls.
The ERDW uses one type of ammo, and there are six slugs supplied in each refuel package.
top
Chaos SniperV2:
Rotates With – Lightning Gun
Classic sniping is back, with the return of Chaos Sniper Rifle. Designed to fit the needs of even the most demanding snipers in the game. It’s equipped with a scope, and fires 2 types of ammo.
Primary Fire:
There are two types of ammo available, and regardless which one you have loaded, primary fire will use one round.
Alternate Fire:
Alt fire will bring up the scope. The longer you hold down the button, the further in it zooms.
→ The Chaotic Dreams Advanced Weapon Option™:
When activated with the Chaos Sniper Rifle, this will enable the Chaos Life-Sign Tracker (LST) system, which uses various methods to detect possible targets. Including heat sensors, heartbeat sensors, and even sound and EM emission detectors, the LST system can accurately detect and identify humans, aliens or machines.
Once a possible target is located, an icon is drawn on the HUD to indicate the location, it is identified (friend or foe, man or machine), and it can even track them if they are behind walls!
The LST system is limited however, in that it does not have the same range as the normal scope.
Ammo Types:
To change ammo types, use the ‘Switch Ammo’ key, which you can bind in the CUT2 configs.
Ammo Type ‘A’: Your standard sniper bullet, traveling at a very high rate of speed. However, it is not an ‘instant hit’ weapon. You may be required to lead your target slightly. You will also see tracer bullets while using the standard ammo (and so will your enemy).
Ammo Type ‘B’: Commonly referred to as RPB’s, these Rocket-Propelled Bullets cause considerable damage, and they and can even penetrate multiple targets. However, due to the nature of their delivery system, they leave a distinctive trail of smoke rings, which the enemy can use to locate your position.
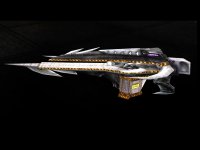
The CUT2 Rocket Launcher
Replaces standard issue Rocket Launcher
 This is a modified version of the standard UT2004 rocket launcher. It uses the same model, and has all the features of the normal UT2004 rocket launcher, but with one very effective enhancement.
→ When the AWO key is pressed, it will activate a hidden laser, and any rockets fired while in this mode will actively seek the laser dot. Which means after firing the rocket, you can then guide it to your target using the laser sight.
The firing configurations remain the same as the standard UT2004 model (primary is a single rocket, secondary charges up 3 rockets), and it uses the same ammo as the standard rocket launcher.
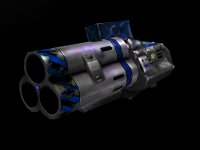
The Gravity Vortex Launcher :
Rotates With – Ion Painter – Redeemer
Combining Physics and Chaos always has wonderful results, and the new and improved vortex launcher is a prime example of this. Each vortex launcher comes equipped with an orb held by the launcher’s field, when released, this orb counts down a short timer, and then activates, resulting in a miniture black hole that sucks the air nearby… and anything that happens to be caught in that air.
Beware, the pull is quite strong and has a decent range, so make sure you can avoid your own vortex before you fire it!
Primary Fire: Starts the timer on the vortex ball and tosses it a few meters in front of the player. After a bounce or two, it will rise up and activate.
Alternate Fire: Instead of a few meters, this mode can toss the sphere much further, but requires charging time, represented by the chargebar in the HUD.
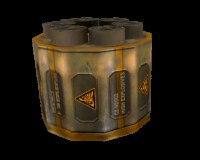
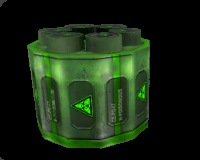
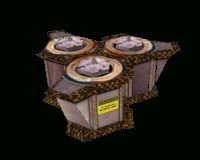
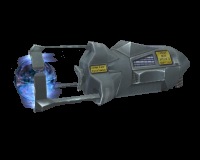
The ChaosUT2 Turrets:
Rotates With – Redeemer & Target Painter
The Chaos Turrets are back! Like many Chaos weapons, basic operation is quite simple, yet the turrets also feature advanced options which can be extremely effective when used properly. To use these turrets, simply pick up the Turret Launcher, and then fire it to place the Turret Beacon at the spot you wish for the turret itself to appear. It takes a few seconds for that to happen though, and if you are killed first, then the process is halted and the turret will not appear. Also, if your turret beacon is damaged, the turret will not appear, so it’s wise to protect the beacon until the turret arrives.
If you and the beacon do survive, and the turret appears, it will do so facing the same direction as you were facing when you fired the turret launcher. It will then begin to scan its surroundings and automaticaly target enemies, including enemy proxies, turrets, and vehicles.
Each Turret Launcher comes with enough juice to fire either two beacons for small turrets (Primary Fire), or one beacon for a large turret (Alternate Fire). There are however, features available on the large turrets that are not available on the small turrets, so choose wisely.
Primary Fire: If primary fire of the turret launcher is used, you can get two small turrets. They are placed one at a time, so you do not have to use them both at once. Small turrets cannot change ammo after being placed. But by pressing the Chaos ‘Switch Ammo’ key before placing a small turret, you can change the ammo type that it will spawn with. A message will appear on your HUD letting you know which ammo type has been chosen.
Alternate Fire: When using alternate fire, you will get one large turret. Large turrets can be reloaded during use, simply by stepping behind it and press your Use key. And you can also manualy switch between the two ammo types during use, by using your Chaos ‘Switch Ammo’ key.
→ The Chaotic Dreams Advanced Weapon Option™: (See this feature on video!)
When you have the turret launcher selected, and an active turret (large or small), you can use the AWO key to ativate the turret-cam. Using this feature allows you to ‘see what the turret sees’, but from a safe distance. Players are vulnerable when using this feature however, as they cannot see their immediate surroundings.
In team games, all the turrets cameras belonging to the same team are networked. So that every player on the team can access all the turret-cams that belong to their team (just select your turret launcher, and keep hitting AWO key to cycle thru the turrets available).
For more detailed information and insight, we now refer you to some of the original documentation that was provided by Chaos engineers involved in the development of this system.
Chaotic Dreams Inc. Military Equipment, Advanced Systems, Defense Turret Gamma3.0 ‘Chickengobbler’, BETA-User Manual. Page3:
(Step 1 : Find Turret Launcher)
(A)- Due to transportation limitations the soldiers will not be equipped with actual Defense Turrets, but rather an enhanced, portable GPS system (turret launcher/ turret beacon), which has been modified to relay additional infortation to and from the Arena (user ammo choice, camera feeds, etc).
(Step 2 : Fire Turret Launcher)
(B)- The beacon has to be placed manually, and will not work anywhere but flat open areas (military insurance benefits no longer pay for soldiers who waste turrets, or who get crushed by their own turrets, due to ill-conceived placement)
(C)- The beacon has to be placed in ‘suitable space’ (according to guiding principle Din4.14d) which means around the beacons location (for large turrets) should be at least 6 feet of space to each side and 12 feet towards the ceiling!
(Step 3 : Turret is beamed in!)
(D)- Once the beacon is placed, the turret will be beamed in within the next FOUR seconds, by your support team from outside the battlefield. Please keep a secure distance!
(E)- If the surrounding space isn’t adequate after all, as described in point, the turret most likely will become stuck in its surroundings and will initiate a self destruction sequence. If this situation should occur, please retreat to a more distant location and expect the cost to be deducted from your earnings.
(Ammo Switching / Reloading)
(F)- The turrets support either standard Tournament rockets or mini-gun bullets to terminate the enemy. Large turrets will automaticaly switch to 2nd ammo type when initial ammo type is depleted. You can also manually force the turret to switch the weapons.
Note: Time ammo switching wisely, because switching between ammo types takes a couple seconds (leaving the turret vulnerable), since only one of these weapon systems can be deployed at a time.
(G)- Only large turrets can be reloaded manually. This is done by stepping behind the turret and hitting your Use key. You must have either rocket or bullet ammo in your inventory.
Don’t forget: You need to bind a ‘Switch Ammo’ key in the ChaosUT2 menu to make the manual weapon switching possible!
Security Note: Do not leave large turrets unguarded when empty! The turret uses the last re-filler as its FFP, [FriendFixPoint] so if an enemy refills it, he will own it.
(Misc)
(H)- Hint: If Friendly Fire is On, don’t shoot at your own turret, or you will trigger the automatic defense system. Turrets are programmed to stay alive.
(I)- Future advancement note: Turret version Gamma3.1 will contain additional remote control functions, so you will have manual guiding and firing abilities from a secure distance.
(J)- Don’t spit into the exhaust pipes!